
AsUnit-X: AsUnit XUL UI for OS X
The XUL UI for the excellent AsUnit by Luke Bayes and Ali Mills has been missing an installer/application bundle for OS X for a while now so, this morning, I decided to create one. After all, now that I have a Mac, how could I pass up the chance to contribute both to the Mac community and to one of my favorite open source Flash projects at the same time?
If you're in a hurry, here's the download link:
Download AsUnit-X (10.9MB), the AsUnit XUL UI for OS X (see what I did there with the name? Clever, I am, I tell you!) :P
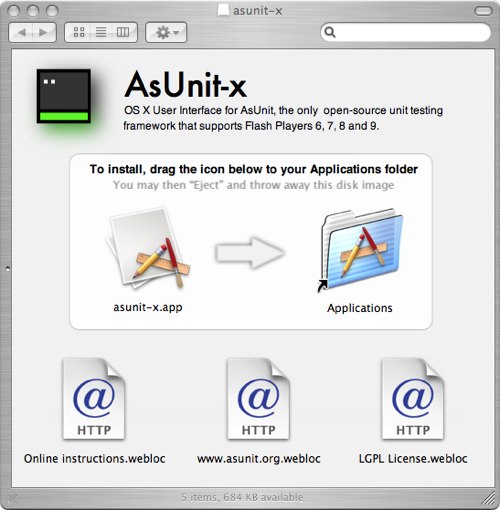
It's a standard Mac application bundle. To install it, just mount the DMG and drag the application icon to the Applications folder icon. In other words, just install it like any other Mac app.
Here are a quick series of steps for setting up a new project using AsUnit-X:
- Launch AsUnit-X
- Click the + icon next to Projects to create a new project using the Wizard
- Enter a name for the project. It doesn't matter what you enter here, it's a description solely for your benefit.
- Under templates, choose the version of ActionScript that you want. For ActionScript 2, there are two options. I selected the one for Flash 8, which uses the AsUnit 2.5 framework. Based on which version you select, make sure you include the correct framework in the classpath of your Flash movie later on.
- Select the source folder where you want AsUnit-X to create your class files.
- Select the folder that you want AsUnit-X to use to create your test cases. For simplicity, you can choose the same folder.
- Next, you need to tell AsUnit-X where the default Flash classes reside. Click the Add button to add the class path (don't be confused by the text at the top of the screen. I spent a few moments trying to paste the class path in there by mistake.) For a default Mac installation, the default Flash framework classes are found in Users/{your user name}/Library/Application Support/Macromedia/Flash 8/en/Configuration/Classes
- Congratulations, you've completed the wizard and set up your project! (You don't have to use the wizard to enter this information, you can use the main UI. You can also alter this information at any time from the main UI.)
And some more steps for creating a class file and unit tests for it:
- Enter the name of a class in the Class Name text box (you can enter a fully-qualified class name that contains package information and AsUnit-X will create the package structure for you).
- Select the access modifier for the class constructor (or make it a Singleton) using the Constructor radio buttons.
- (Optional) Select a superclass at this point by either typing in the name of a class or select a class from the classpath by clicking the Choose button.
- (Optional) Add any interfaces that you want your class to implement by adding them to the Interfaces list box by using the Add button.
- If you want AsUnit-X to automatically create a test case for your class, check the Create Test Case checkbox. You can choose to make the test case a standard one (synchronous), a Mock Object or an asynchronous test (e.g., for testing classes that rely on externally loaded data).
- If you want AsUnit-X to automatically create test suites for your class, check the Generate Test Suites checkbox.
- Finally, click the Create button to create your class and your test case. Click the Run Now link next to Generate Test Suites to generate your test suite.
And, finally, some steps for actually running the tests. To run the tests, you will need to create an FLA that is known as the Test Runner. To do this:
- Open up Flash and create a new FLA. Call it MyTestRunner or something equally exciting.
- On Frame 1 of the FLA, add the following code:
MyTestRunner.main(); - Before you do anything else, add the AsUnit framework to your classpath. To do this, open up Flash's preferences (Flash Professional → Preferences...), select ActionScript from the Category list box and click the ActionScript 2.0 Settings button in the Language field. Use the + button to add a path to your classpath. The AsUnit framework is included in the AsUnit-X application bundle so you can point to it from there. For a default installation, the path should be: {Your Computer's Name}:Applications:AsUnit-X.app:Contents:Frameworks:asunit:as25. Change the last folder to the version of the framework you want (or, even better, add all three -- you'll only need to do this once and the settings will work with all of your projects.)
- Next, actually create the MyTestRunner class. Here's how a simple one looks:
import asunit.textui.TestRunner;

    class MyTestRunner extends TestRunner
    {
        public function MyTestRunner()
        {
            start(AllTests);
        }

        public static function main():Void
        {
            var runner:MyTestRunner = new MyTestRunner();
        }
		}
I'm not a big fan of using a static main() method in Flash but, in this case, it makes sense so that your test suites can be run by both the Flash IDE (Macromedia compiler) and MTASC. - Test your MyTestRunner FLA and you should see the default AsUnit interface appear with the familiar red bar that tells you that your test case (with an automatically generated failing test) was added to your test suite correctly.
I realize that these are quick notes but I thought I'd jot them down here as I had a lot of difficulty trying to find documentation or tutorials for AsUnit, especially the 2.5 branch. I will try and create a more illustrated tutorial if I get time, with screenshots and whatnot.
If you're interested, here are the steps I followed to create the bundle:
- Install the Mac version of the XULRunner framework.
- Downloaded the OS X build of the AsUnit XUL UI from asunit.org.
- Create an application bundle (a folder called AsUnit-X.app) in Finder and populate it according to the excellent instructions on the Deploying XULRunner 1.8 page at Mozilla and Ricardo Pacheco's XULRunner on OS X blog post. The exact rsync command to run is rsync -rl /Library/Frameworks/XUL.framework/ /path/to/your/bundle/AsUnit-X.app/Contents/Frameworks/XUL.framework/ (the Mozilla docs are a bit confusing on which folder you need to copy.) Make sure you create the Info.plist file based on the one in Ricardo's blog post. If all goes well, you should a running Mac app at this point.
- Add the framework. I added this into a folder called asunit in the Frameworks folder in the bundle.
- Finally, package it into a DMG. I found these instructions for creating a DMG by Remko Tronçon to be very useful and owe a debt of gratitude to Adium, from which I ripped the background graphic and symlink for the Applications folder. AsUnit-X doesn't have its own icon yet but that may change in the near future (OS X-style icon donations are welcome!)
While creating the DMG, I came across an issue that caused me some delay (which was completely unnecessary!) After converting the disk image to a compressed image using the Disk Utility, Finder would no longer open the mounted image in icon view (on my system, it defaulted to column view). I saw that others were having this problem also and initially attempted to address it by using the pkg-dmg perl script from Mozilla. Unfortunately, that didn't like the symlink to Applications and tried to copy the actual Applications folder over and failed. So, I decided to follow the instructions on this thread but that didn't work either (although I am digging the power of the hdiutil command.) Finally, I decided to see if throwing money at the problem would work and tried out Drop DMG and FireStorm, neither of which worked. It was only at this point that I realized that there wasn't anything wrong with the image files I was creating but that I had had "Open new windows in column view" checked in my Finder preferences. Doh! Unchecking this showed that the image files were displaying correctly after all!
I hope this makes AsUnit easier to access for developers on the Mac platform and that you enjoy using AsUnit-X.
Download AsUnit-X (10.9MB)
Comments
by niqui on 2006-12-15 09:17:00
by aYo on 2007-01-23 17:27:19
by » Blog Archive » ASUnit Step-By-Step: Part One on 2007-03-09 20:26:24
by » Blog Archive » ASUnit Step-By-Step: Part One on 2007-03-09 20:26:24
by Suite75 Development Blog » AsUnit on OS X on 2007-03-23 11:16:07
by Yuri on 2007-11-09 04:09:45
by trebor on 2008-04-22 20:14:17
by Eric on 2008-06-23 17:51:12
by Sunil Gupta on 2008-02-16 15:29:23
by Gloria W on 2008-10-19 23:46:05
by Danyal on 2010-04-21 09:09:44
by Ahmed Abbas on 2010-05-25 02:25:21
by ugg boots on 2010-12-14 03:45:35